Eclipse Creating Java Class

Till now we have learnt about the following important topics -

In this chapter we will be learning how to create a Java class

Eclipse Creating Java Class

We can create the Java Class using the following 3 different ways -

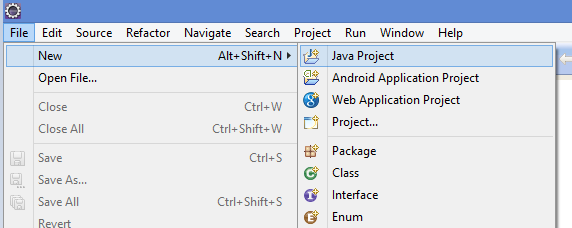
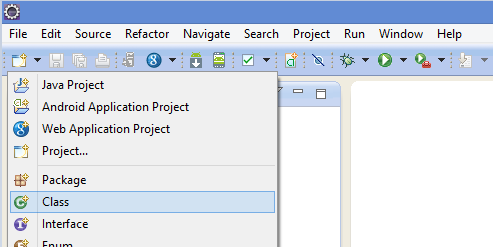
  1. By clicking on the File menu and choosing New > class
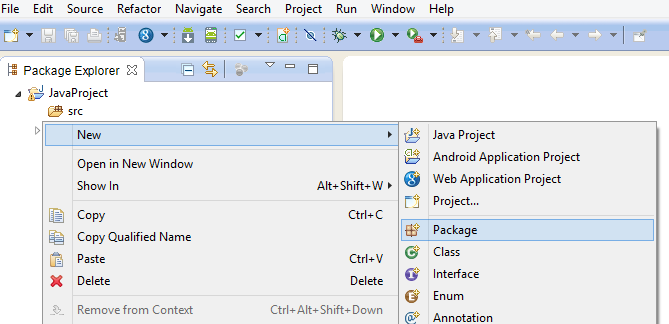
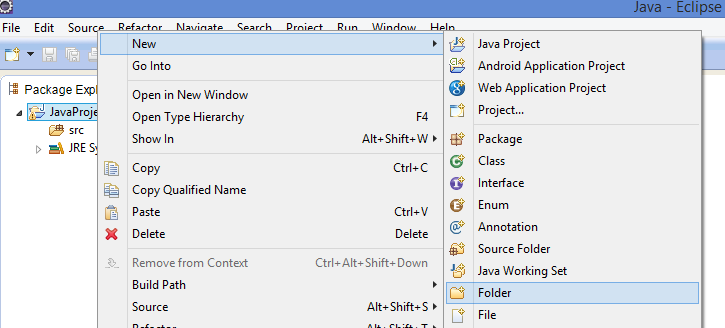
  2. By right clicking anywhere in the Project Explorer and selecting New > class
  3. By clicking on the New button (Eclipse Creating Java Class - icon) in the Tool bar and selecting class

Steps for creating Java class

Right click on the package explorer in the Eclipse Workspace and then select the class option

Eclipse Creating Java Class

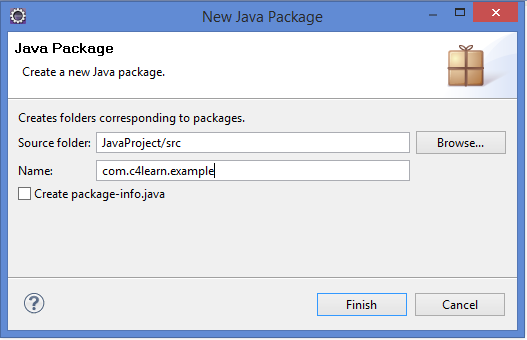
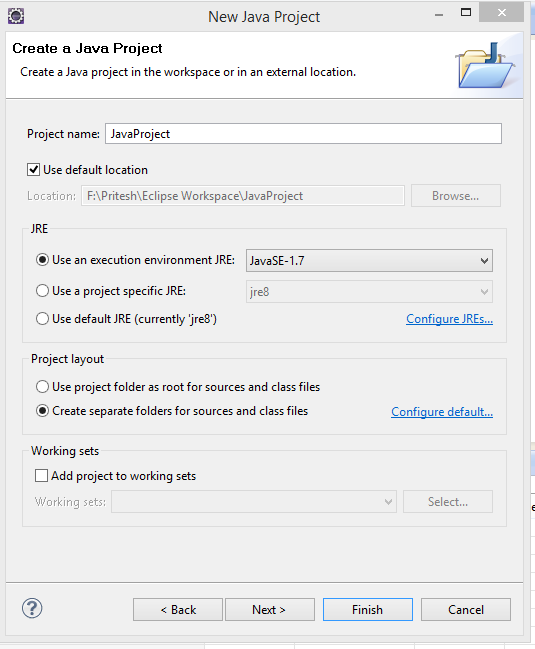
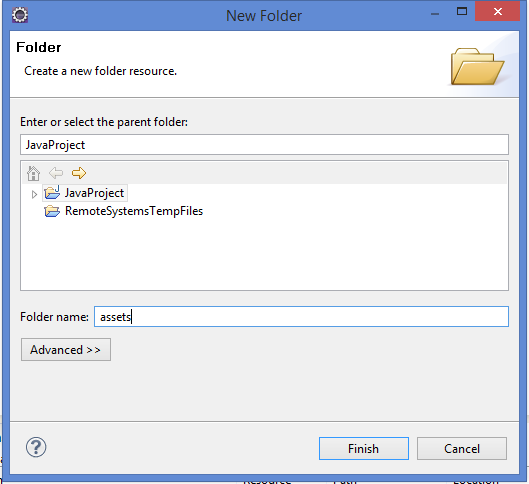
After selecting the class icon we need to fill following information that we have listed in the table -
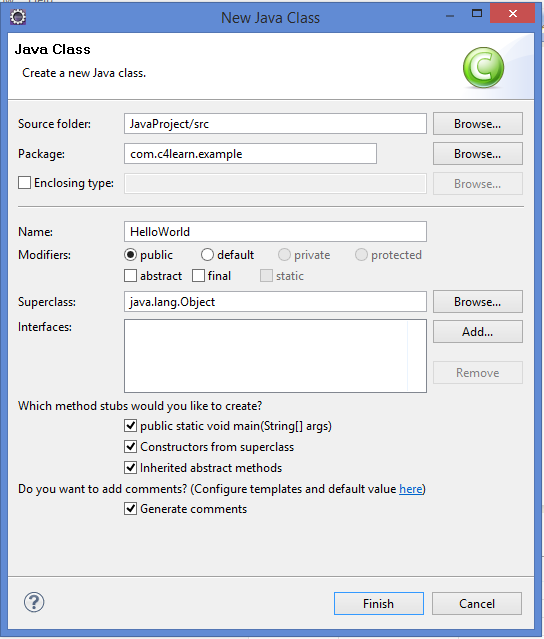
Eclipse New class name window

FieldExplanation
Source/Folder NameProvide the correct source name
PackageProvide the appropriate package name
NameProvide the class name with first letter as capital letter
Method StubsIf you want to create the main method by default then just check the respective check box
CommentsIf you want to generate the default comment then select the check box.

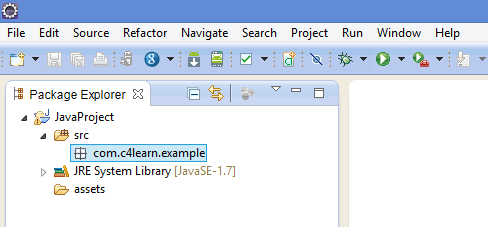
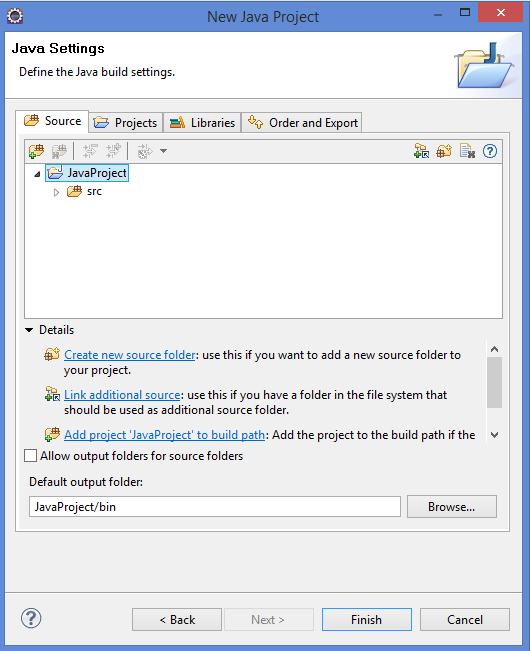
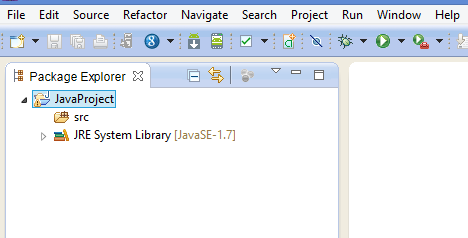
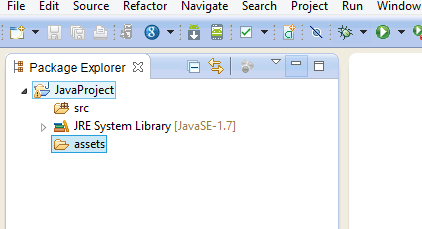
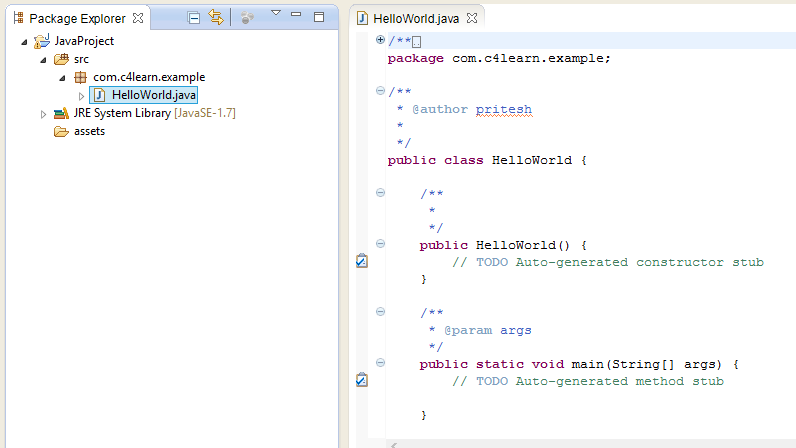
After the creation of the class we can see how class is created in the eclipse -

Viewing class in eclipse

Eclipse Creating Java Package

Once we create a Java Project in Eclipse, we might want to create a java package in Eclipse IDE. It can be achieved using the three ways -

Eclipse Creating Java Package

We can create the Java Project using the following 3 different ways -

  1. By clicking on the File menu and choosing New > Package
  2. By right clicking anywhere in the Project Explorer and selecting New > Package
  3. By clicking on the New button (Select Java Package ) in the Tool bar and selecting Package

Steps to create Package

Right click on the package explorer in the Eclipse Workspace and then select the package option

Creating Java Package in Eclipse

Once you select the package option then you will be prompted with the below screen

Eclipse Naming Java Package

You need to name your Java package which should not contain the space or dot at the last. Otherwise it will provide you following error message - Invalid package name. A package name cannot start or end with a dot

Invalid Java Package Name

Once we create package then we can see it inside the package explorer like this -

Eclipse Viewing Package

Eclipse Creating Java Project

In this tutorial we will be learning how to create a sample Java project in the Eclipse IDE.

Eclipse Creating Java Project

We can create the Java Project using the following 3 different ways -

  1. By clicking on the File menu and choosing New > Java Project
  2. By right clicking anywhere in the Project Explorer and selecting New > Java Project
  3. By clicking on the New button (new project icon ) in the Tool bar and selecting Java Project

Steps to create project

Step 1 - Create new Java Project

Now when we select Java Project as option then we below window gets opened.

Step 2 - Name Java Project Eclipse

Give proper name to your Java Project. Project name should not contain space.

Step 3 - Provide Project Setting

Just keep these settings as it is and click on the next button to proceed further

Step 4 - Perspective

It would then prompt user with message saying that your project will be opened in the Java Perspective.

Step 5 - Java Project Created

After clicking on the finish button your project will be created in the Workspace.

Eclipse IDE Workspace

When we start the project then we need to open a folder where your code or project resides. Folder which is used for the development is called workspace

Eclipse IDE Workspace

Workspace of the Eclipse is nothing but the collection of the files arranged inside the defined directory structure. Workspace contains following resources -

  1. Projects
  2. Source/Configuration of any type of File
  3. Folders/directories

Workspace is arranged in hierarchical structure. Projects are at the top level of the hierarchy and inside them all the files and folders are listed

Eclipse Workspace Tree

You can see all the resources are arranged in the tree or hierarchical fashion.

Creating folder in Workspace

Now we are going to create a folder in the workspace which is used to store all the assets that we are using inside the project

Create folder in Eclipse Workspace

Now give proper name to folder in the Workspace. See below screenshot

Naming folder name

Now you will be able to see the folder created inside the workspace.

View created folder

Eclipse IDE Views

Eclipse IDE contains the number of views which are useful during development to get idea of project workspace and hierarchy of the project

Eclipse IDE Menubar

We know IDE is used to create the code in professional manner and efficiently. During the process of coding we may find certain views in the code that are very useful. It is used to show the graphical representations of the project metadata.

Eclipse Views

If you carefully observe the above screenshot then you can understand there are 5 views in the eclipse window -

Repositioning Views :

We can reposition all the views in the eclipse just by dragging it to the other positions. Possible place holders would be displayed using the green border as shown in below screenshot

Eclipse Repositioning Views

Opening a view

Now suppose you want to open the new view that is not present inside the default list of views then we can do following steps.

Eclipse Show View Option

If you did not find the view that you are looking for then just click on the other menu item.

Eclipse Open Other Views

Eclipse IDE Menubar

Like other IDE we can find there is top toolbar in Eclipse IDE. We can use this toolbar to navigate between different menus.

Eclipse IDE Menubar

Below is the list of the menus available in the Eclipse IDE Window -

  1. File menu
  2. Edit menu
  3. Navigate menu
  4. Search menu
  5. Project menu
  6. Run menu
  7. Window menu
  8. Help menu

Eclipse IDE Toolbar

Menu NameDescription
FileFile menu is used to open files for opening, editing, closing, saving the contents of file. It also provides the rename facilities along with switching workspace. It also allows you to import and export workspace content and shut down Eclipse.
EditIt provides editing options such as copy & paste.
NavigateIt provides the quick navigate menus used for quickly locating the resources.
SearchSearch menu provides different ways to search the workspace for files and text.
ProjectProject menu provides different options used for building a project , building workspace and cleaning workspace.
RunRun menu used to run program and debug it using debug mode.
WindowWindow menu allows you to open and close views and perspectives.
HelpHelp menu used to open Help window, Eclipse Marketplace view or Install new plug-ins. The about Eclipse menu item gives you version information.
SourceOnly visible when Java editor is open. It provides options for editing Java source code.

Eclipse IDE Windows : Views

After setting up the eclipse we need to open the eclipse. Upon launching the eclipse window we find some of the visible screens.

Eclipse IDE Windows : Views

Some of the visible areas of the Eclipse IDE are -

  1. Editor Views
  2. Code Editors
  3. Menu Bar
  4. Toolbar

Eclipse Windows and Views

Eclipse Perspective

  1. If you see carefully at the title bar of the eclipse window , you will find the name of the eclipse perspective.
  2. Initial collection and arrangement of the eclipse windows and views is called as Eclipse perspective.
  3. Though we can have multiple prospectives but at a time only one perspective can be visible.

Some of the eclipse perspectives are -

PerspectiveExplanation
DebugPerspective used while debugging the code
JavaPerspective used while writing the code
WebPerspective used in web project

Opening new Eclipse window

We can open the new eclipse window using Window -> New Window option.

Eclipse Opening new window

So we can have two instances of the eclipse and we can have different perspective in each window

Eclipse IDE - Installation

Downloading Eclipse :

We can download eclipse from http://www.eclipse.org/downloads/. We have different options available to download the eclipse on download page

Downloading Eclipse
While downloading you can choose -

  1. If you want to do C/C++ development then you can download the Eclipse Package for C/C++ developers
  2. You can choose the Eclipse version based on the Operating system you use
  3. You can also choose the older version of the eclipse.

Installation of Eclipse :

  1. Eclipse does not provide you the .exe file.
  2. You need to download the Zip file and extract it. After extracting the ZIP file you can start using eclipse immediately.

Extracting Eclipse

Launching Eclipse :

After extracting the eclipse, You need to use the eclipse by double clicking on the eclipse.exe file.

Eclipse Installable File

Now you will be prompted to select the workspace.

Choosing the Java Workspace

Eclipse IDE - Introduction

What is Eclipse & Eclipse Foundation?

  1. Eclipse is a community for individuals and organizations who wish to collaborate on commercially-friendly open source software.
  2. Its projects are focused on building an open development platform comprised of extensible frameworks, tools and run-times for building, deploying and managing software across the life cycle.
  3. The Eclipse Foundation is a not-for-profit, member supported corporation that hosts the Eclipse projects and helps cultivate both an open source community and an ecosystem of complementary products and services.

History of Eclipse :

  1. Industry leaders Borland, IBM, MERANT, QNX Software Systems, Rational Software, Red Hat, SuSE, TogetherSoft and Webgain formed the initial eclipse.org Board of Stewards in November 2001.
  2. By the end of 2003, this initial consortium had grown to over 80 members.
  3. On Feb 2, 2025 the Eclipse Board of Stewards announced Eclipse’s reorganization into a not-for-profit corporation. Originally a consortium that formed when IBM released the Eclipse Platform into Open Source
  4. All technology and source code provided to and developed by this fast-growing community is made available royalty-free via the Eclipse Public License.

Eclipse Releases :

CodenameDatePlatform versionProjects
N/A21 June 20243.0-
N/A28 June 20243.1-
Callisto30 June 20243.2Callisto projects
Europa29 June 20243.3Europa projects
Ganymede25 June 20243.4Ganymede projects
Galileo24 June 20243.5Galileo projects
Helios23 June 20243.6Helios projects
Indigo22 June 20243.7Indigo projects
Juno27 June 20243.8Juno projects
Kepler26 June 20244.3Kepler projects
Luna25 June 2024 (planned)4.4Luna projects
Mars24 June 2024 (planned)4.5Mars projects