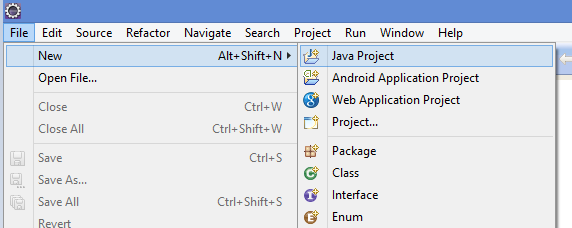
Once we create a Java Project in Eclipse, we might want to create a java package in Eclipse IDE. It can be achieved using the three ways -
Eclipse Creating Java Package
We can create the Java Project using the following 3 different ways -
By clicking on the File menu and choosing New > Package
By right clicking anywhere in the Project Explorer and selecting New > Package
By clicking on the New button ( ) in the Tool bar and selecting Package
Steps to create Package
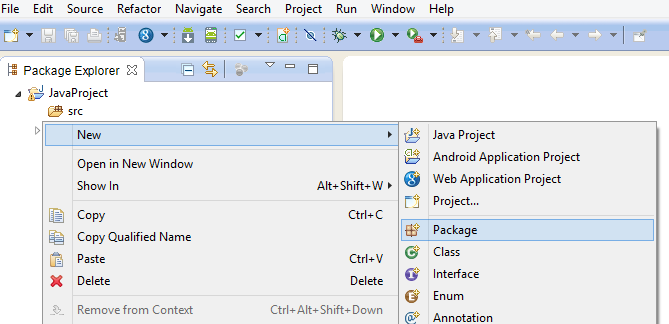
Right click on the package explorer in the Eclipse Workspace and then select the package option
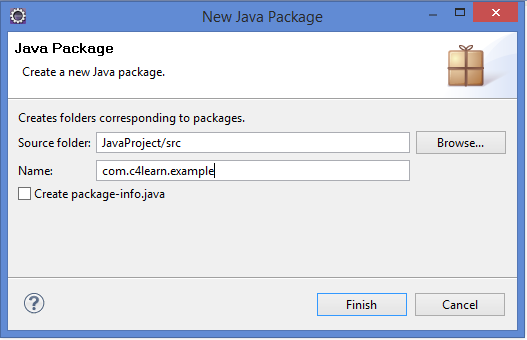
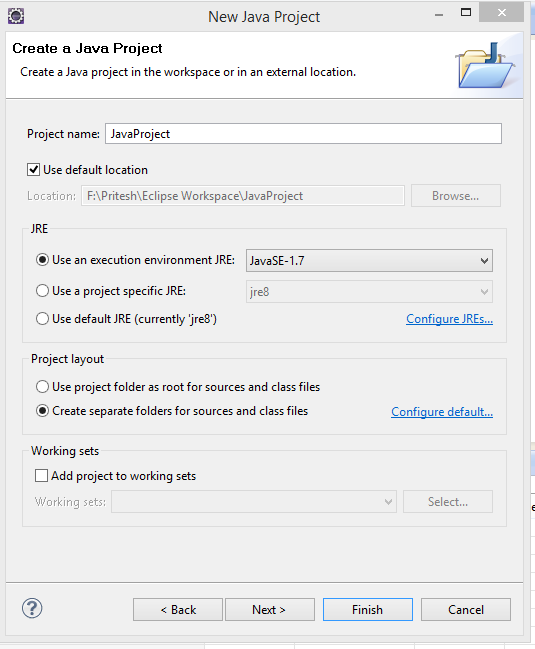
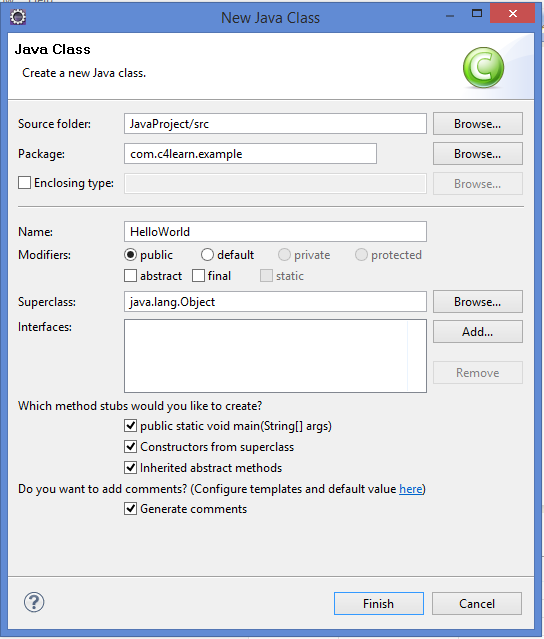
Once you select the package option then you will be prompted with the below screen
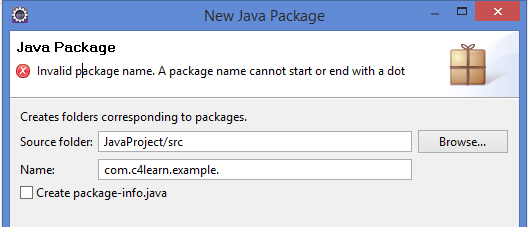
You need to name your Java package which should not contain the space or dot at the last. Otherwise it will provide you following error message - Invalid package name. A package name cannot start or end with a dot
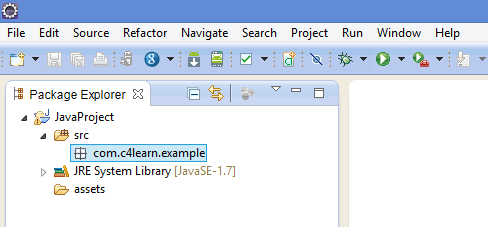
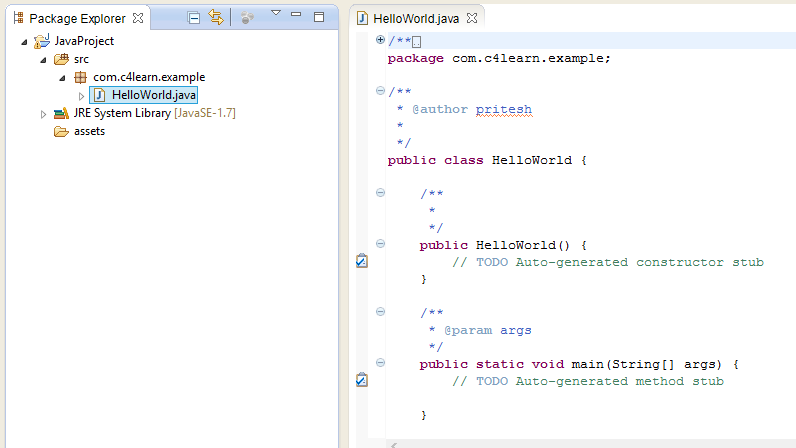
Once we create package then we can see it inside the package explorer like this -
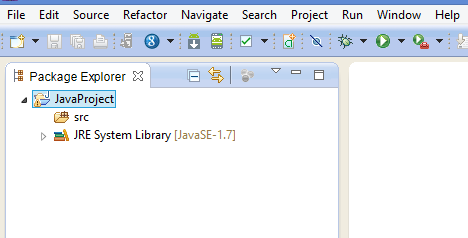
When we start the project then we need to open a folder where your code or project resides. Folder which is used for the development is called workspace
Eclipse IDE Workspace
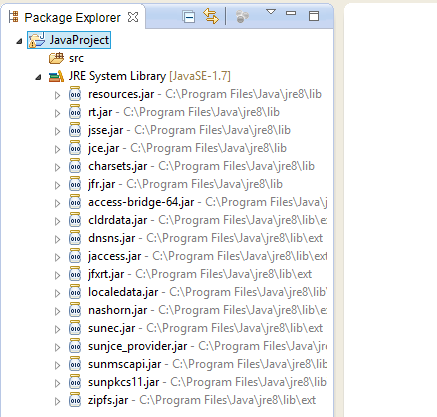
Workspace of the Eclipse is nothing but the collection of the files arranged inside the defined directory structure. Workspace contains following resources -
Projects
Source/Configuration of any type of File
Folders/directories
Workspace is arranged in hierarchical structure. Projects are at the top level of the hierarchy and inside them all the files and folders are listed
You can see all the resources are arranged in the tree or hierarchical fashion.
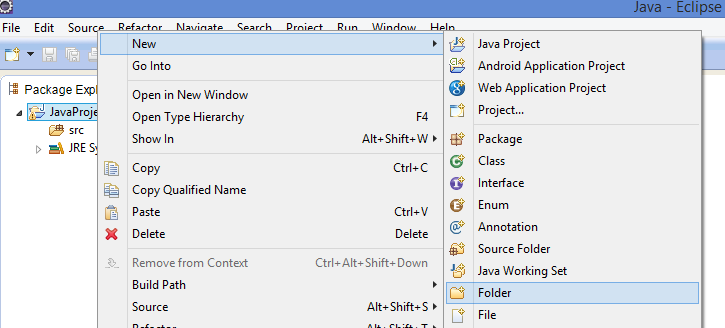
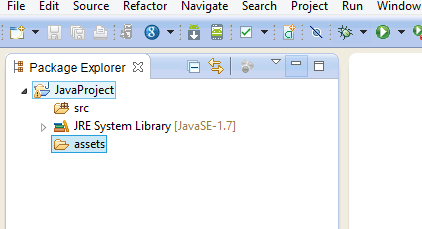
Creating folder in Workspace
Now we are going to create a folder in the workspace which is used to store all the assets that we are using inside the project
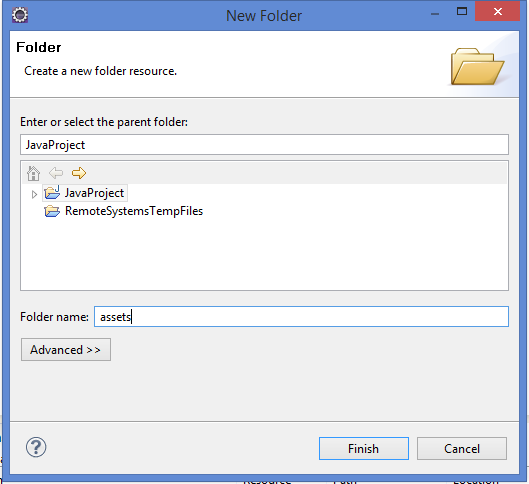
Now give proper name to folder in the Workspace. See below screenshot
Now you will be able to see the folder created inside the workspace.
Eclipse IDE contains the number of views which are useful during development to get idea of project workspace and hierarchy of the project
Eclipse IDE Menubar
We know IDE is used to create the code in professional manner and efficiently. During the process of coding we may find certain views in the code that are very useful. It is used to show the graphical representations of the project metadata.
If you carefully observe the above screenshot then you can understand there are 5 views in the eclipse window -
Repositioning Views :
We can reposition all the views in the eclipse just by dragging it to the other positions. Possible place holders would be displayed using the green border as shown in below screenshot
Opening a view
Now suppose you want to open the new view that is not present inside the default list of views then we can do following steps.
If you did not find the view that you are looking for then just click on the other menu item.
Like other IDE we can find there is top toolbar in Eclipse IDE. We can use this toolbar to navigate between different menus.
Eclipse IDE Menubar
Below is the list of the menus available in the Eclipse IDE Window -
File menu
Edit menu
Navigate menu
Search menu
Project menu
Run menu
Window menu
Help menu
Menu Name
Description
File
File menu is used to open files for opening, editing, closing, saving the contents of file. It also provides the rename facilities along with switching workspace. It also allows you to import and export workspace content and shut down Eclipse.
Edit
It provides editing options such as copy & paste.
Navigate
It provides the quick navigate menus used for quickly locating the resources.
Search
Search menu provides different ways to search the workspace for files and text.
Project
Project menu provides different options used for building a project , building workspace and cleaning workspace.
Run
Run menu used to run program and debug it using debug mode.
Window
Window menu allows you to open and close views and perspectives.
Help
Help menu used to open Help window, Eclipse Marketplace view or Install new plug-ins. The about Eclipse menu item gives you version information.
Source
Only visible when Java editor is open. It provides options for editing Java source code.
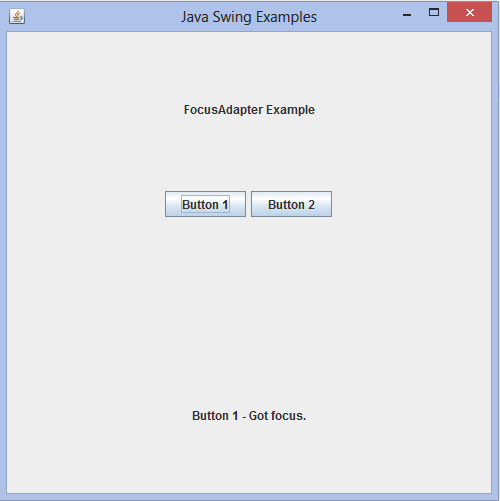
After running program in the eclipse you will see below output
Explanation
In this example consider below two buttons -
JButton btn1 = new JButton("Button 1");
JButton btn2 = new JButton("Button 2");
Now we have added focus listener for the button 1 -
btn1.addFocusListener(new FocusAdapter(){
public void focusGained(FocusEvent e){
msgLabel.setText("Button 1 - Got focus.");}
public void focusLost(FocusEvent e){
msgLabel.setText("Button 1 - Lost focus.");}});
Now focusLost() method will provide the code to be executed when button1 will lost its focus. Similarly focusGained() method would be executed when button 1 gains focus.

 ) in the Tool bar and selecting class
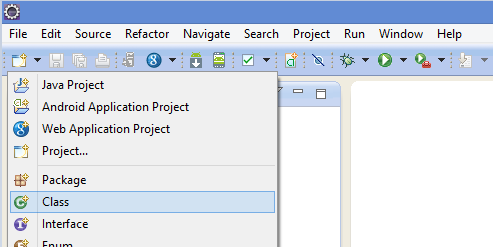
 ) in the Tool bar and selecting Package